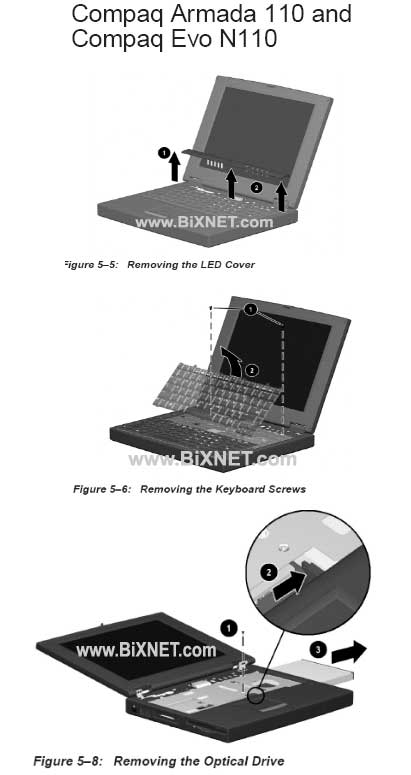
The pictures below show Compaq Armada 110 & Evo N110 Optical Drive (CD/CD-RW/DVD Drive) Installation Guide.
 1. Unplug AC power, remove internal battery.
2. Remove the LED Cover:
Turn the computer top side up with the front facing you
Open the computer
Lift up the lest edge of the LED cover (figure 5-5)
Lift up the front edge of the LED cover from left to right
Lift the LED cover straight up to remove it.
3. Remove the keyboard:
Remove the two M2.5x5 screws securing the keyboard to the base enclosure (Figure 5-6)
Swing the back edge of the keyboard up and forward until it rests on the top cover
Release the zero insertion force (ZIF) connector to which the keyboard cable is connected and disconnect the keyboard cable from the system board.
Remove the keyboard
4. Remove the Optical Drive:
Remove the M2.5x4.5 screw that secures the optical drie to the heat sind (Figure 5-8)
Push the back edge of the optical drive to the right to disconnect it from the connector on the system board
Slide the optical drive out of the base enclosure
5.Reverse the above procedure to install the new optical drive.
Following are compatible optical drives to replace the original drive. Please note that their front bezel color and shape may not exactly same as the original one.


